

Installasi dual boot Windows 7 + CentOS 6.7 (Lengkap)
Installasi Windows 7
Sebelum melakukan installasi system operasi windows 7, tentukan media apa yang Anda gunakan untuk menginstall windows 7 melalui DVD atau menggunakan Flashdrive.
- Download aplikasi Rufus untuk membuat Flashdrive sebagai boot untuk melakukan installasi windows 7 pada PC / Laptop anda. Klik disini untuk mendownload aplikasi Rufus kemudian download file .iso Windows 7 Kilk disini.
- Setelah download buka Rufus tampilan awal seperti ini:
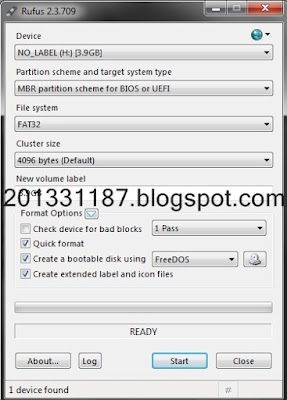
- Pada bagian Device pilih lokasi Flashdrive yang akan di gunakan, lalu setting seperti pada gambar kemudian pilih file .iso yang telah anda download, klik Start untuk melakukan format Flashdrive tunggu hingga proses format selesai.

- Selanjutnya restart PC / Laptop jangan lupa untuk setting bios untuk booting menggunakan Flashdrive yang telah diformat menggunakan Rufus. Apabila anda menggunakan DVD setting bios untuk booting menggunakan DVD-drive.


Proses Installasi
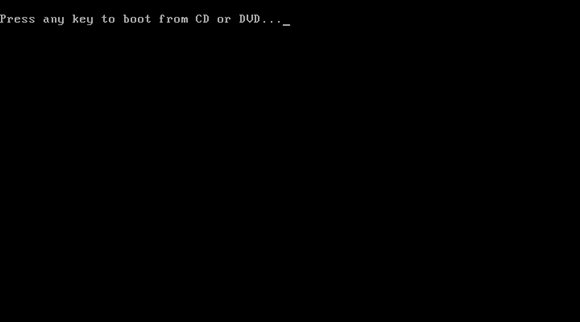
Step 1 :
Akan muncul bacaan Press any key to boot CD... (tekan sembarang tombol pada keyboard).
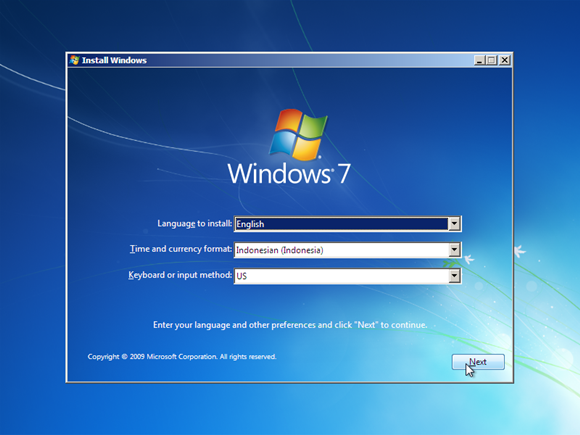
Step 2 :
Silakan pilih Indonesian (Indonesia) pada Time and currency format. Untuk Language to install dan Keyboard or input method biarkan default. Kemudian pilih Next.
Step 3 :
Step 4 :
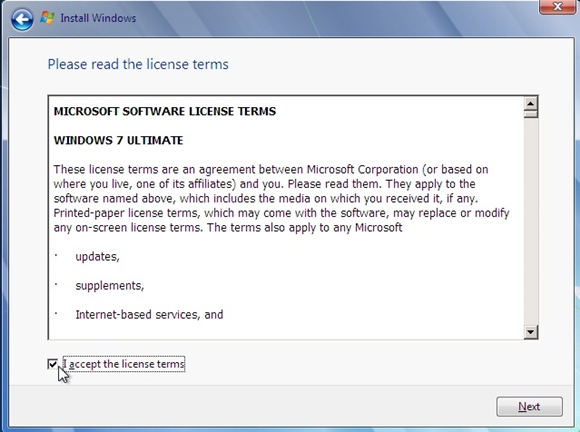
Centang I accepted the license terms, kemudian pilih Next.
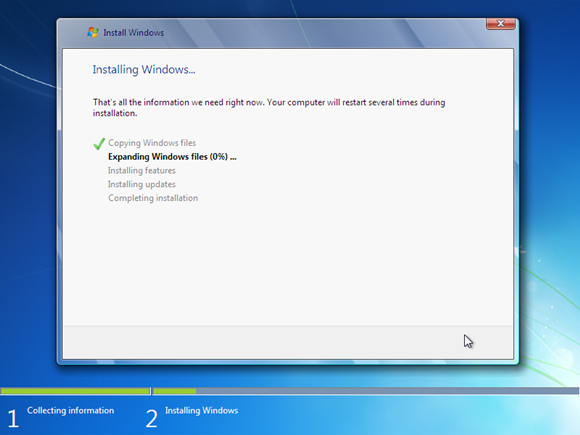
Proses instalasi windows 7 berlangsung. Proses ini memakan waktu kurang lebih 20 menit. Selama proses berlangsung, komputer akan reboot / restart dengan sendirinya beberapa kali.

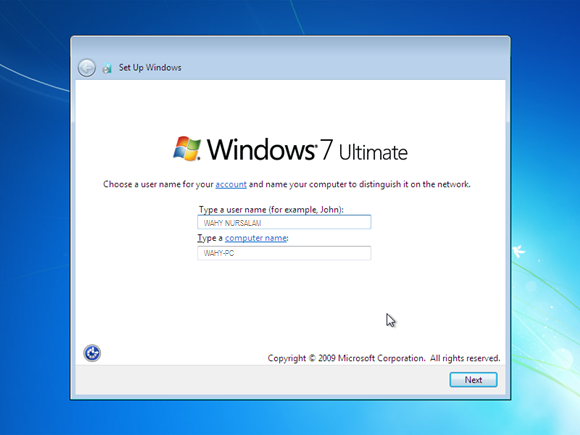
Langkah selanjutnya yaitu memasukkan nama pengguna dan nama komputer. Kemudian pilih Next.
Step 5 :
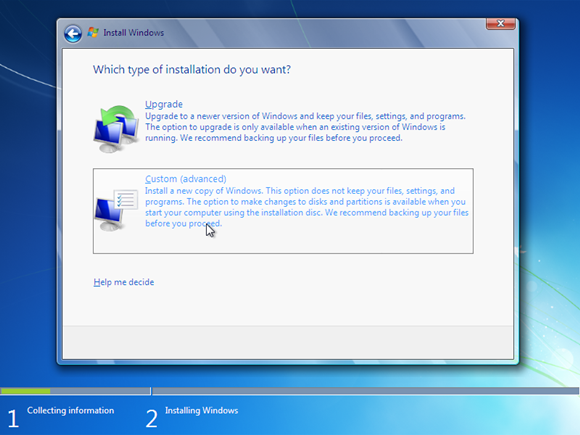
Pilih Custom (advanced).
Step 6 :
Pilih partisi Harddisk yang akan dipilih sebagai lokasi installasi Windows 7
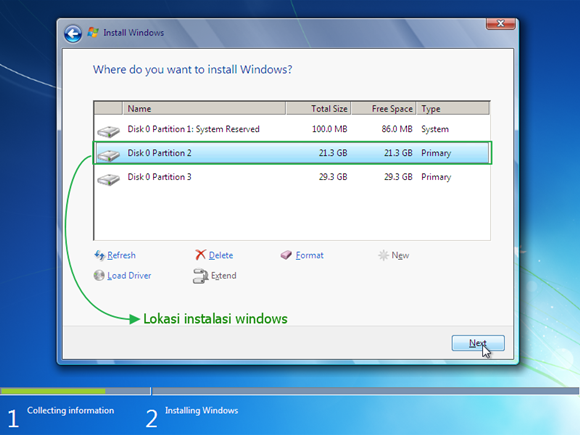
Step 7 :
Proses instalasi windows 7 berlangsung. Proses ini memakan waktu kurang lebih 20 menit. Selama proses berlangsung, komputer akan reboot / restart dengan sendirinya beberapa kali.
Step 8 :
Pada saat PC / Laptop restart, Jangan tekan tombol apapun pada keyboard! Hal tersebut akan menyebabkan anda mengulangi proses instalasi dari awal.
Step 9 :
Langkah selanjutnya yaitu memasukkan nama pengguna dan nama komputer. Kemudian pilih Next.
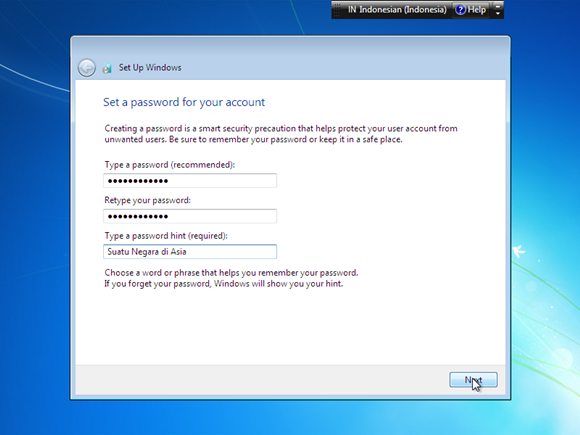
Step 10 :
Langkah berikutnya yaitu membuat password untuk akun Windows. Saran saya, buatlah password yang kuat dengan kombinasi angka dan simbol. Sedangkan untuk password hint, isikan kata atau kalimat yang membantu anda mengingat password akun anda. Jika anda tidak ingin menambahkan password pada akun anda, biarkan saja kosong. Kemudian pilih Next.
Step 11 :
Silakan masukkan product key windows 7, kemudian pilih Next. Jika tidak mempunyai product key, klik disini atau anda bisa lewati langkah berikut ini tanpa memasukkan product key. Tetapi, tanpa aktivasi product key, anda hanya dapat menggunakan Windows 7 selama masa trial (30 hari). Selanjutnya pilih Next.

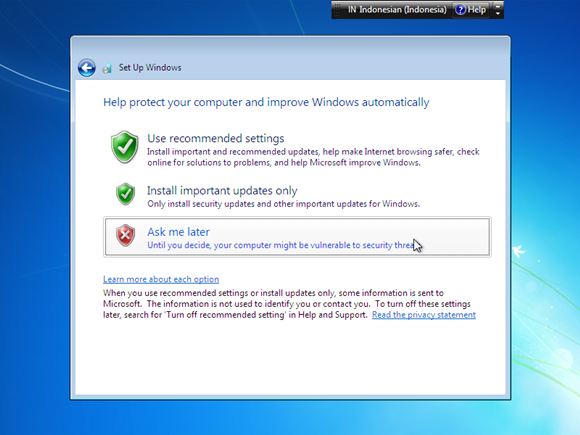
Step 12 :
Untuk Windows Update, silakan pilih Ask me later.
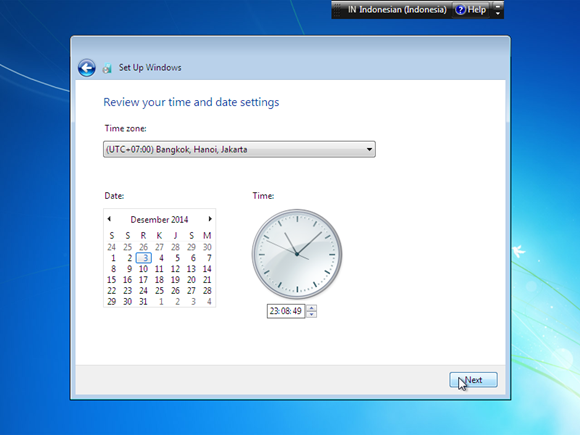
Step 13 :
Untuk Time zone/ zona waktu. Pilih (UTC+07:00) Bangkok, Hanoi, Jakarta.
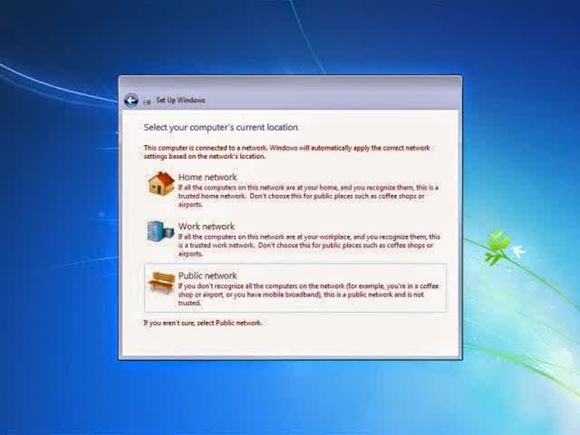
Step 14 :
Langkah berikutnya yaitu menentukan lokasi jaringan. Silakan pilih Public Network.
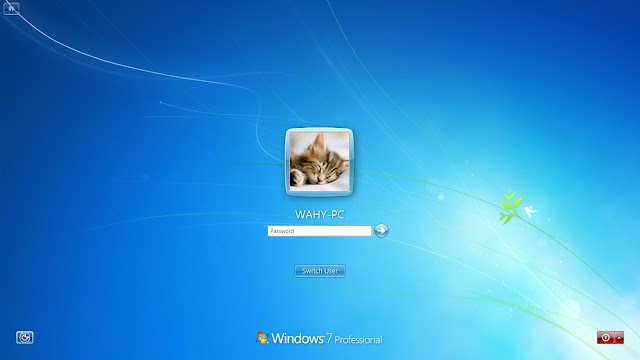
Step 15 :
Jika anda menambahkan password untuk akun anda seperti pada Step 11. Anda harus memasukkan password terlebih dahulu untuk masuk ke layar dekstop. Kemudian tekan Enter. Proses Instalasi Windows 7 telah Selesai.
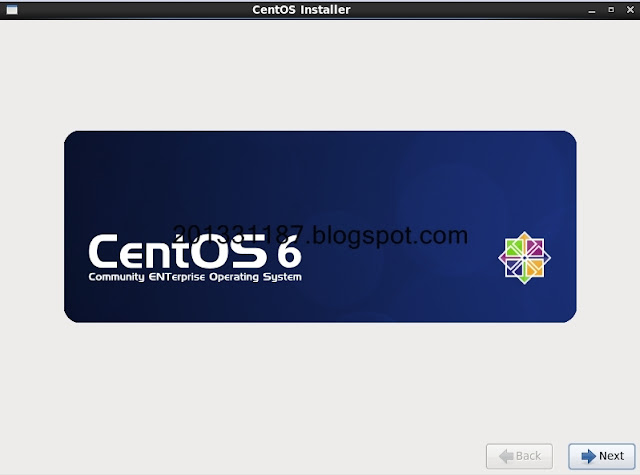
Installasi CentOS 6.7
Setelah PC / Laptop di install Windows 7 langkah-langkah yang harus dipersiapkan sebelum menginstall CentOS 6.7 adalah sebagai berikut:


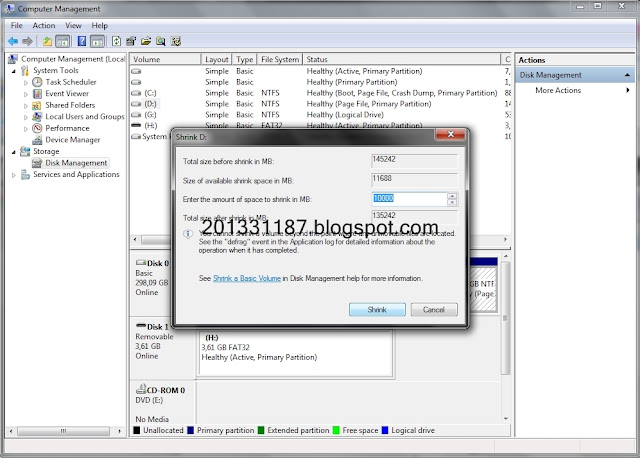
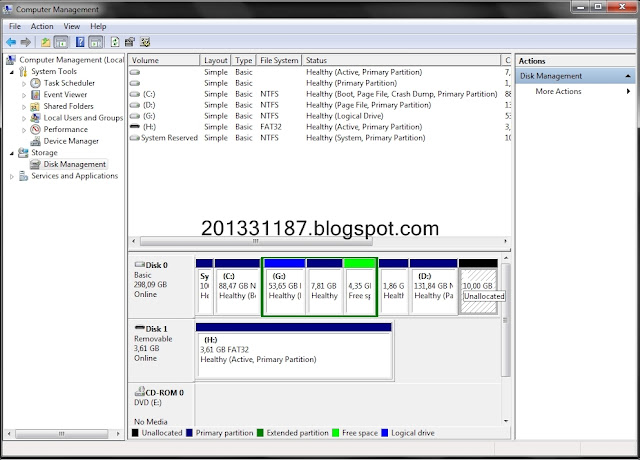
- Sediakan ruang kosong didalam Harddisk sebagai tempat untuk melakukan installasi CentOS. Start > Computer Management. Pilih tab Storage > Disk Management. Klik kanan pada partisi yang akan digunakan kemudian Shrink Volume. Sediakan ruang kosong 10GB, 7GB untuk root 2GB untuk swap 1GB untuk /usr.
- File .iso CentOS 6.7 klik disini untuk download, sesuaikan arsitektur yang di gunakan 32bit atau 64bit. Disini Saya menggunakan Live DVD 32bit.
- Selanjutnya burning .iso CentOS ke Dvd / Cd.
- Anda juga bisa menggunakan Flashdrive untuk melakukan installasi CentOS 6.7, pertama download aplikasi UNetbootin klik disini. Pada Distribusi pilih CentOS 6_Live kemudian pilih file .iso yang telah di download dengan mengklik ... untuk Drive merupakan lokasi Flashdrive yang akan di gunakan untuk booting. Klik OK tunggu hingga proses selesai.


- Selanjutnya restart PC / Laptop jangan lupa untuk setting bios untuk booting menggunakan Flashdrive yang telah diformat menggunakan UNetbootin. Apabila anda menggunakan DVD setting bios untuk booting menggunakan DVD-drive.

Proses Installasi
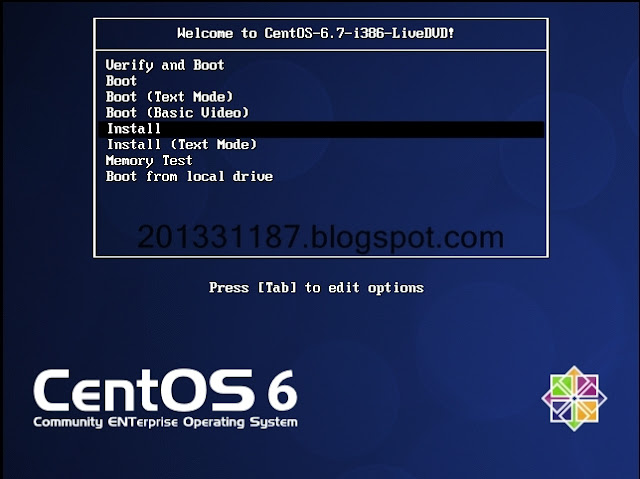
Step 1 :
Akan muncul tampilan awal GRUB Live DVD CentOS 6.7. Silahkan pilih Install.


Step 2 :
Proses selanjutnya yakni installasi, pilih Next.
Step 3 :
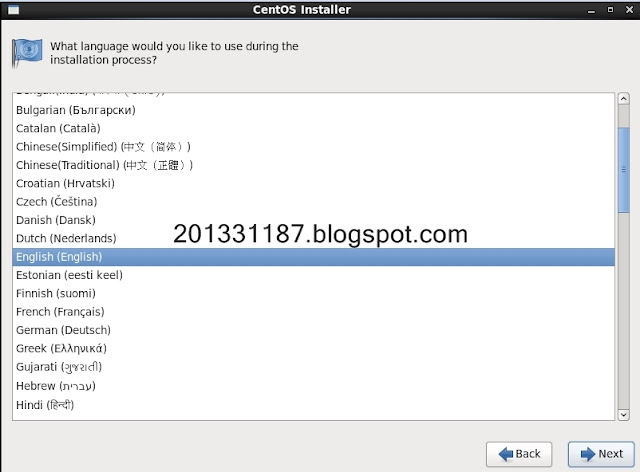
Pilih bahasa yang digunakan, klik Next saja.
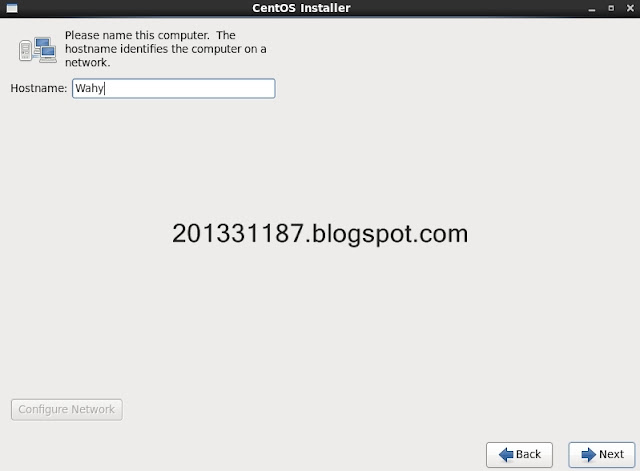
Step 4 :
Selanjutnya memberi nama komputer, isikan nama komputer pilih Next.
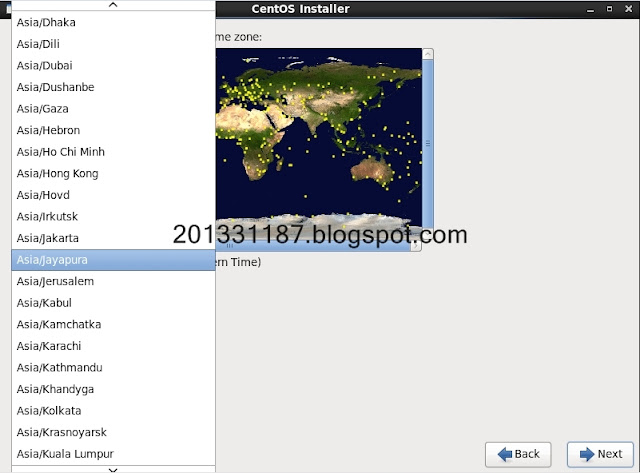
Step 5 :
Memilih Time Zone, pilih Asia/Jakarta klik Next.
Step 6 :
Mengisi password untuk Super User / root, klik Next.
Step 7 :
Selanjut nya pilih Create Custom Layout, klik Next.
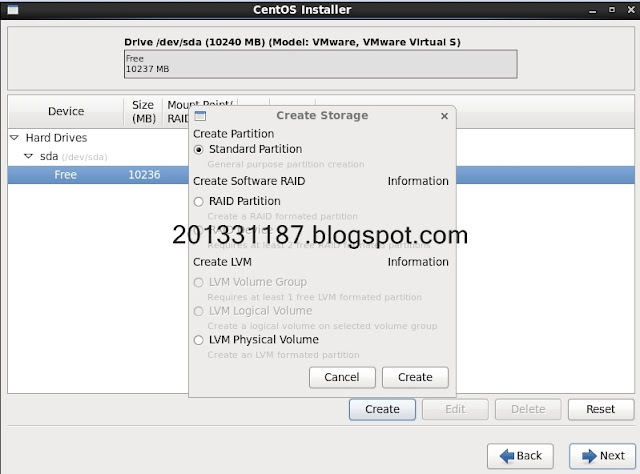
Step 8 :
Pilih partisi yang telah anda buat dari Windows 7 kemudian klik Create. Pilih Standard Partition klik Create.
Step 9 :
Pilih Mount Point "/", File System Type "ext4", Size (MB) isi 7000 / sesuai keinginan, klik OK.
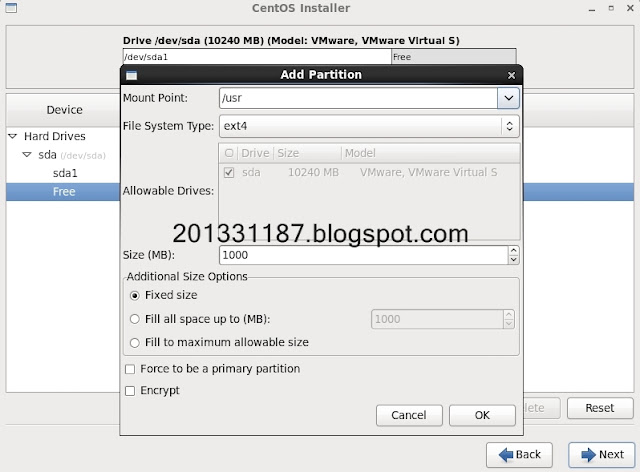
Step 10 :
Lakukan kembali Step 8, Pilih Mount Point "/usr", File System Type "ext4", Size (MB) isi 1000 / sesuai keinginan, klik OK.
Step 11 :
Lakukan kembali Step 8, Pilih File System Type "swap", Size (MB) isi 2000 / sesuai keinginan, klik OK, klik Next.
Step 12 :
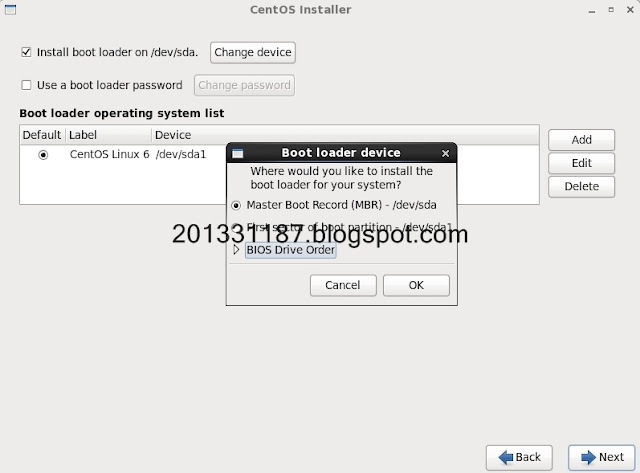
Installasi boot loader pilih Master Boot Record (MBR) - /dev/sda, klik OK, klik Next.
Step 13 :
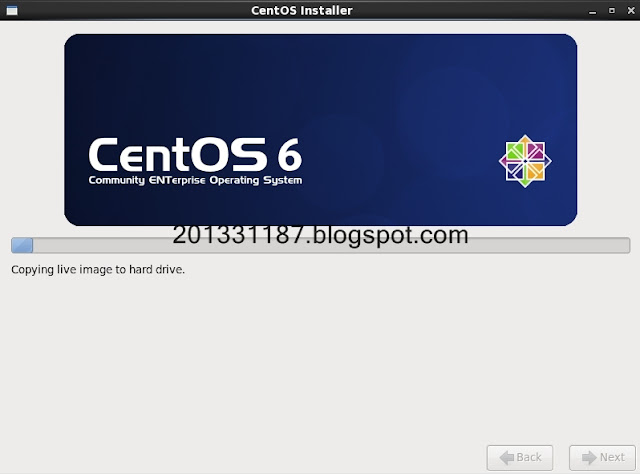
Proses copy file ke PC / Laptop, ini memerlukan waktu sekitar 10 - 20 menit. Kemudian PC / Laptop akan restart.
Step 14 :
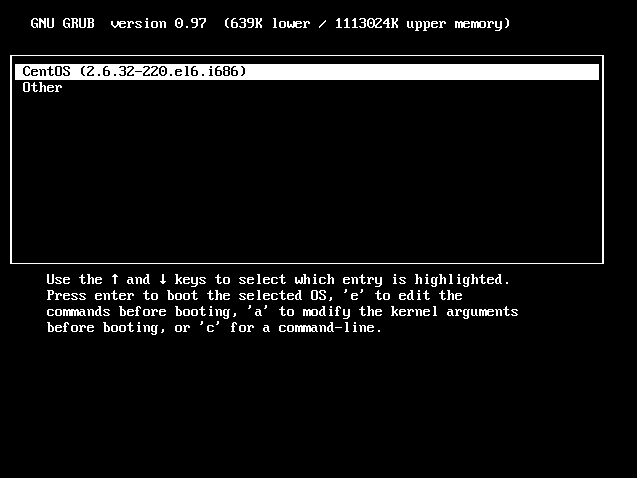
Proses installasi selesai, ini merupakan tampilan GRUB anda bisa tekan Enter untuk menjalankan Sistem Operasi CentOS atau memilih Other untuk menjalankan Sistem Operasi WIndows 7.
Tambahan
Editing the CentOS 6 Boot Menu
Once you have logged into the system, completed the tasks presented by the setup agent and the desktop is visible the next step is to configure the boot menu so that it lists the alternate operating system as Windows instead of Other. The boot menu configuration settings are stored in the /boot/grub/menu.lst file. This file may be edited in a terminal window as follows:
su -
gedit /boot/grub/menu.lst
When prompted by the su command to enter a password be sure to enter the root password created during the installation process, not the password you created for your user account during the setup agent configuration steps.
The contents of a typical menu.lst file is listed below:
# grub.conf generated by anaconda
#
# Note that you do not have to rerun grub after making changes to this file
# NOTICE:  You have a /boot partition.  This means that
#          all kernel and initrd paths are relative to /boot/, eg.
#          root (hd0,1)
#          kernel /vmlinuz-version ro root=/dev/mapper/vg_centos62-lv_root
#          initrd /initrd-[generic-]version.img
#boot=/dev/sda
default=0
timeout=5
splashimage=(hd0,1)/grub/splash.xpm.gz
hiddenmenu
title CentOS (2.6.32-220.el6.i686)
        root (hd0,1)
        kernel /vmlinuz-2.6.32-220.el6.i686 ro root=/dev/mapper/vg_centos62-lv_root rd_NO_LUKS LANG=en_US.UTF-8 rd_LVM_LV=vg_centos62/lv_swap rd_LVM_LV=vg_centos62/lv_root rd_NO_MD quiet SYSFONT=latarcyrheb-sun16 rhgb crashkernel=auto  KEYBOARDTYPE=pc KEYTABLE=us rd_NO_DM
        initrd /initramfs-2.6.32-220.el6.i686.img
title Other
        rootnoverify (hd0,0)
        chainloader +1
The above menu.lst file contains options to boot for two operating systems. The CentOS section of the configuration typically reads as follows:
title CentOS (2.6.32-220.el6.i686)
        root (hd0,1)
        kernel /vmlinuz-2.6.32-220.el6.i686 ro root=/dev/mapper/vg_centos62-lv_root rd_NO_LUKS LANG=en_US.UTF-8 rd_LVM_LV=vg_centos62/
lv_swap rd_LVM_LV=vg_centos62/lv_root rd_NO_MD quiet SYSFONT=latarcyrheb-sun16 rhgb
crashkernel=auto  KEYBOARDTYPE=pc KEYTABLE=us rd_NO_DM
        initrd /initramfs-2.6.32-220.el6.i686.img
The Windows section of the configuration is likely to be similar to the following:
title Other
        rootnoverify (hd0,0)
        chainloader +1
The default=0 line indicates that the first entry in the file is to be the default operating system (in other words, the operating system that will boot by default if the user does not intervene during the boot phase). The timeout=5 directive specifies the number of seconds the boot screen is displayed before the default operating system is automatically booted.
To configure the system to boot Windows by default simply change this line so that it reads as follows:
default=1
To increase or decrease the timeout before the default operating system boots, change the timeout value (in this case to 20 seconds):
timeout=20
The final task in our dual boot configuration process is to rename the Windows boot option to something more descriptive than "Other". To achieve this, simply change the "Other" line as follows:
title Windows
Note that the title value can be anything you choose.
The next time the system is rebooted, the boot screen will wait 20 seconds before auto-booting. If no keys are pressed the system will now boot Windows by default, instead of CentOS 6. If the user does intervene and display the boot menu, the Windows option is now titled "Windows" and not "Other".
Accessing the Windows Partition from CentOS 6
When running CentOS 6 in a dual boot configuration it is still possible to access files located on the Windows partition. This can be achieved by manually mounting the partition from the command-line. Before doing so, however, some additional packages need to be installed on the system. To do so, run the following commands inside a terminal window:
su -
yum install fuse
Next, we need to set up access to the Dag RPMForge repositories:
For 32-bit systems:
rpm -Uhv http://apt.sw.be/redhat/el6/en/i386/rpmforge/RPMS/rpmforge-release-0.5.2-2.el6.rf.i686.rpm
For 64-bit systems:
rpm –Uhv http://apt.sw.be/redhat/el6/en/x86_64/rpmforge/RPMS/rpmforge-release-0.5.2-1.el6.rf.x86_64.rpm
Next, install the NTFS driver:
yum install fuse-ntfs-3g
Once the requisite packages are installed, the next step is to create a directory to use as the mount point for our Windows partition. In this example we will create a directory called /windows:
mkdir /windows
When prompted for a password by the su command, enter the root password specified during the CentOS 6 installation process. In order to identify the device name that has been assigned to the Windows partition, use the fdisk command as follows:
[root@localhost ~]# fdisk -l

Disk /dev/sda: 21.5 GB, 21474836480 bytes
255 heads, 63 sectors/track, 2610 cylinders
Units = cylinders of 16065 * 512 = 8225280 bytes
Sector size (logical/physical): 512 bytes / 512 bytes
I/O size (minimum/optimal): 512 bytes / 512 bytes
Disk identifier: 0x86008600

   Device Boot      Start         End      Blocks   Id  System
/dev/sda1   *           1        1276    10249438+   7  HPFS/NTFS
/dev/sda2            1277        1340      512000   83  Linux
/dev/sda3            1340        2611    10209280   8e  Linux LVM
In the above output, the main Windows partition containing the files we need access to is /dev/sda1.
Next, we need to run the mount command (still with root privileges and assuming the Windows partition is /dev/sda1 and NTFS format - this may be different on your system):
mount –t ntfs-3g /dev/sda1 /windows
Under some circumstances you may get a message that the Windows partition needs to be checked. If so, either reboot into Windows again and manually run chkdsk (if it does not run automatically during the boot process), or force the mount with the –o option:
mount /dev/sda2 /windows -o force
To automate the mount each time the system is booted, simply add the mount line to the /etc/fstab file:
/dev/sda1 /windows ntfs defaults 0 0
To unmount the Windows file system at any time:
umount /windows
Sumber Tambahan :
http://www.nesabamedia.com/2015/05/tutorial-cara-menginstal-windows-7.html
http://www.techotopia.com/index.php/Installing_CentOS_6_with_Windows_in_a_Dual_Boot_Environment


0 komentar :
Posting Komentar